Function instruction:Search all private protocal IPC devices under the same network. Especially, ONVIF devices must have the same network segment or else ONVIF device won’t appear in the Device list.
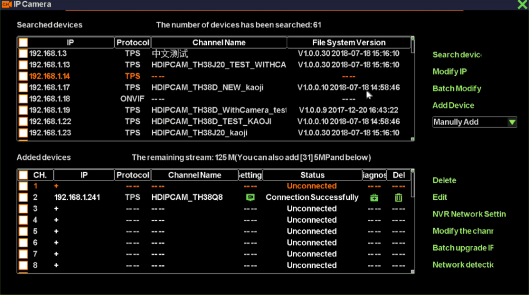
Operation steps:Right-click on desktop, and then select video management in context menu. Click on ‘search’ button and finish the search operation.
Remarks: When you change the device-add method to ‘Automatic Add’, NVR will automatically search devices in you LAN each time you enter Video Management interface. Otherwise, NVR search devices only when you click ‘search device’ button.
Function instruction:Add private or ONVIF protocol IPC devices to NVR
Operation steps:
Remarks: Double-click alse can add devices to the list.
Function instruction:Used to delete IPC device
Operation steps:
Function instruction: Used to add IPC devices manually
Operation steps :
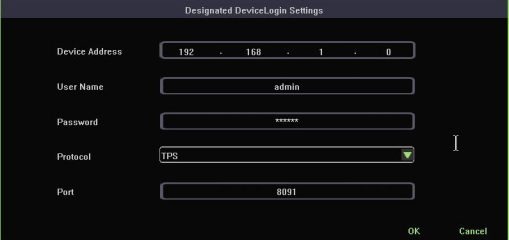
REMARKS: If your want to add an ONVIF device to NVR, you need to change the protocol type to ONVIF.
Function instruction: Modify the IP address of a device
Operation steps:
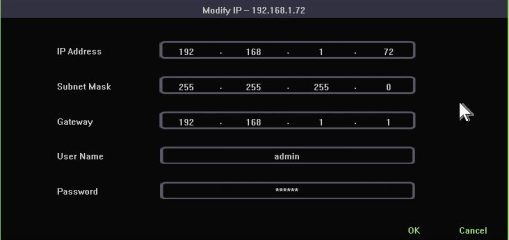
Function instruction: Modify IP address of series of IPC device
Operation steps:
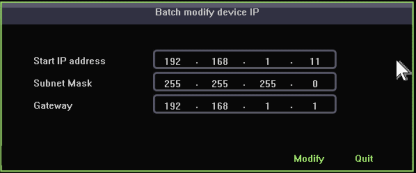
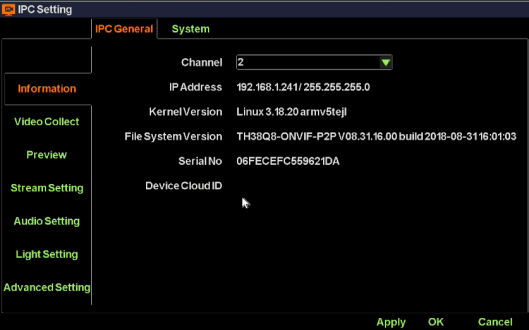
Function instruction: Used to setup IPC configuration.
Operation steps:
Function instruction:Used to examine and set NVR network information
Operation steps:
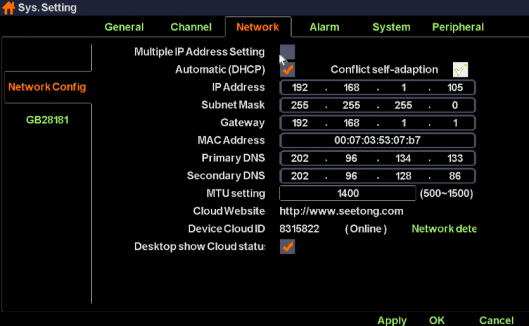
Detailed function list
|
IP Name |
Function Description |
Remarks |
|
Multiple IP Address Setting |
Used to give NVR device an extra IP address |
|
|
IP Address |
Used to set/modify NVR’s IP address |
|
|
Subnet Mask |
Used to show NVR’s subnet mask information |
|
|
Gateway |
Used to show NVR’s gateway address |
|
|
Primary DNS |
Show NVR primary DNS information |
|
|
Secondary DNS |
Show NVR secondary information |
|
|
MAC ADDRESS |
Used to show NVR MAC address information |
|
|
Auto acquire IP(DHCP) |
Used to gain IP address automatically |
When USE DHCP, you can’t modify IP address manually |
|
IP Self-adapt |
Used to self-adapt IP address when IP conflict occurs |
|
|
Cloud Number |
Show NVR device ID |
|
|
Website |
Show website of cloud platform |
|
|
Cloud State |
Show NVR P2P state |
You can remote access to NVR device only when the Cloud State is ‘online’ |
|
Cloud desktop show |
Control whether you would like to see P2P state at the top of desktop |
|
|
Network detection |
Used to diagnose NVR and IPC network condition. |
When NVR hasn’t been activated, this position is replaced as a Activate button. |
|
Long network line support |
If you tick the checkbox, your POE devices can support long network line transport. Otherwise, your POE devices can support at most 120m Transport. |
|
|
Close Vlan |
Tick the checkbos if you need to search the POE devices in your LAN. |
|
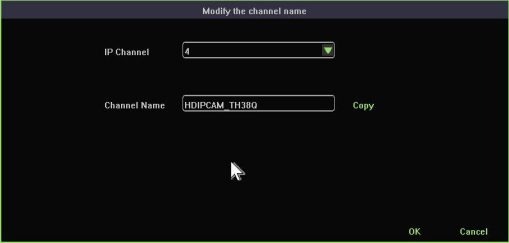
Function instruction: Used to modify IPC OSD
Operation steps: Left click ‘IP camera’ in contextmenu. Select one channel and click ‘Modify the channel name’ button. As the following picture shows:
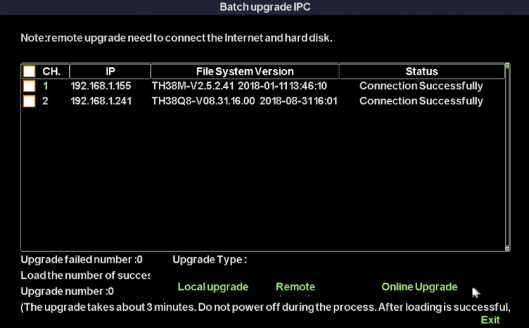
Function instruction: Used to upgrade series of IPC devices at one time
Operation steps:
Function instruction: Used to analyse the network conditions of IPC devices which has been added to NVR.
Operation steps: Left click ‘IP camera’ in contextmenu. Click ‘Network detection’ button. System then turns to ‘Local Network Detection’ window, as the following picture show:
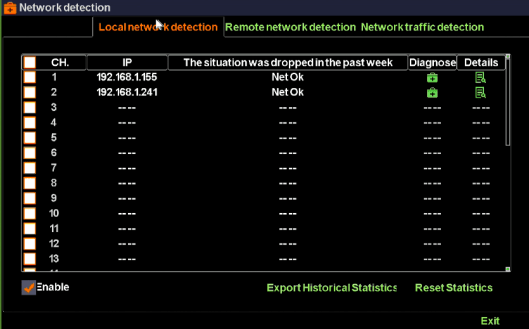
Detailed function list:
|
Function Name |
Function Description |
Remarks |
|
‘Enable’ checkbox |
Enable local network detection |
You should ensure that you have set up disk on the NVR. |
|
Export Historical Statistics |
Export historical statistics to U-disk |
|
|
Reset Statistics |
Reset all statistics |
|
|
‘Diagnose’ button |
Used to diagnose current channel network condition |
|
|
‘Details’ button |
Used to display current channel network condition |
|
Function instructions: Used to analyse the network condition of NVR and get you some advices to solve network problems.
Operation steps: Left click ‘IP camera’ in contextmenu. Click ‘Network detection’ button. System then turns to ‘Remote Network Detection’ window, as the following picture show:
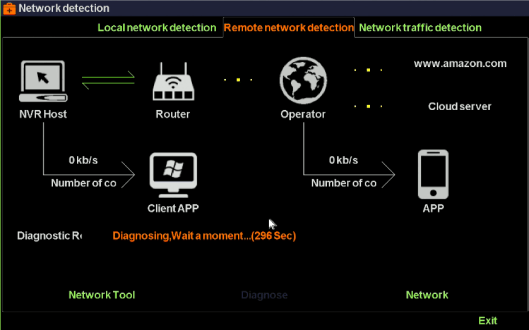
Detailed function list:
|
Function Name |
Function Description |
Remarks |
|
Network tool |
Used to check whether there’s packet loss on the NVR device. |
|
|
‘Diagnose’ button |
Used to activate diagnosis to the NVR |
|
|
‘Network’ button |
Used to modify network configure of the NVR |
|
|
Diagnostic result |
Display current network condition of NVR and give you several ways to solve the possible problems. |
|
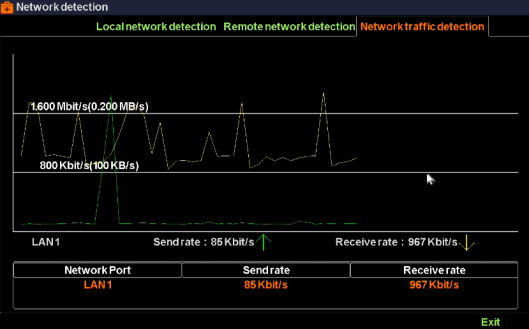
Function instruction: Used to show current network flows of the NVR
Operation steps: Left click ‘IP camera’ in contextmenu. Click ‘Network detection’ button. System then turns to ‘Network Traffic Detection’ window, as the following picture show:
How to set recording system