Dahua Camera Troubleshoot Guide Check if the network environment is good and the network cable hole plug of IPC end is loose. Check if there is IP conflict. Check if the device is under normal power supply.
Quick Reference
| IP Camera FAQ | |
|---|---|
| Problem | Solution |
| My IP Camera is off line from time to time | |
| Check if the network environment is good and the network cable hole plug of IPC end is loose. | |
| Check if there is IP conflict. | |
| Check if the device is under normal power supply. | |
| Check if the device upgraded to a wrong program. | |
| My IP Camera is off line from time to time | |
| Log in again to check if upgrade is successful, because sometimes the progress bar doesn’t show feedback in time due to the network environment. | |
| Check if the network environment is normal, and there is disconnection or power failure during upgrade. | |
| Check if the program and the device are matched. | |
| I can use “Ping” to test that the IPC is on line after upgrade, but fail to log in. | |
| Check if the WEB port was modified. | |
| Reset the device and log in again. | |
| There is no code stream when I log in and the network program restarts constantly after upgrade. | |
| Check if there is IP conflict or network disconnection. | |
| Check if the device is under normal power supply. | |
| Check if each connection line is loose inside the device after disassembling the camera. | |
| Check if the application program of IPC is corresponding to the model, and check if N/P format program is correct. | |
| Check if the control and WEB are correct, there is control running permission under WIN7, you can delete the control under C:\Program Files\webrec and eliminate IE buffer memory to reload control and WEB. Please run IE as administrator for WIN 7, you need to install QuickTime plug-in if it is non-IE browser. | |
| It displays “Resources are limited, failed to open video” after I log in the IPC. | |
| Network bandwidth is not enough; change a switcher with bigger bandwidth. | |
| Too many users logging in, and it is beyond the device code stream output capacity. | |
| Disconnect the network or restart the device repeatedly, see 1.1 for more details. | |
| IR effect is bad. | |
| Users didn’t use specified power supply, and failed to enable all the IR lights. | |
| The object is so far that it is out of the range of IR light. | |
| IR-CUT is set as color mode, which caused the front-end sensor to fail to sense IR light. | |
| When you use the device on the table (especially rough surface), the IR light will shoot back to the lens, which will cause bad IR effect and white picture. At this moment, you should adjust the elevation angle of the lens or place the device on the edge | |
| The device failed to record video and snapshot. | |
| “Snapshot time period” is set wrongly; storage path is not correct; “video mode” is set as off. | |
| Set “video time period”, “snapshot time period” in the WEB interface; please refer to the <IPC WEB Operation Manual> for more details. | |
| Check if the “memory point” enable in the WEB interface is checked. | |
| Check if the connection of SD and FTP of video and snapshot storage is normal, try to connect FTP to the computer. | |
| Set “video mode” as manual or auto in the WEB interface. | |
| Black edge appears in the image after upgrade. | |
| Eliminate IPC configuration or restore factory default after upgrading program. | |
| Upgraded program is not corresponding to the IPC model, re-upgrade correct program. | |
| Cross stripe or diagonal stripe appears in the image of IPC. | |
| Bad connection for the video cable. | |
| Strong current interference | |
| The IPC image is unsteady. | |
| Bad connection for the video cable | |
| Gray screen appears in the IPC. | |
| Gray screen appears in the IPC, it can recover after restart under the state of power off, gray screen appears repeatedly. | |
| Caused by insufficient power supply. | |
| Check if the IPC power supply mode and power adapter are too far away from the IPC. | |
| Gray screen appears in the IPC. | |
| Use the IR-blocking ring of the lens, or reinstall the light-blocking ring to a proper position | |
| I forgot the Device IP. | |
| Find the device IP by quick configuration tool. | |
| If you know the device MAC address, you can set device IP address by modifying ARP/Ping command. Please refer to <WEB Operation Manual> for more details. | |
| If you are Apple user, you can search the Bonjour server name of IPC and log in IPC by the browser with Bonjour service. | |
| I failed to log in WEB. | |
| User name and password are not correct, network and power adapter problems. | |
| Please enter correct user name and password. | |
| Check if the network cable is normal and usable, and check if the network configuration is correct or pull out the network cable plug in again. | |
| Please connect default power adapter | |
| I failed to play the downloaded audio and video files. | |
| Player problem. | |
| Please download the company default player from the disc. | |
| Install graphics acceleration software whose version is higher than DX8.1 | |
| Use MEDIA PLAYER to play the file which is converted to AVI format, install Div X503Bundle.exe plug-in. | |
| Winxp operating system needs to install plug-in DivX503Bundle.exe and ffdsho-20041012.exe. | |
| Day/night config switch is invalid. | |
| Device system time is not corresponding to computer time. | |
| Single click “Camera setting > Camera property > Configuration file management > Switch according to time” in the WEB interface, set time period according to the computer time. | |
| Synchronize the device time and current PC time. | |
| Device is leaking water. | |
| Users dismantled the front cover and rear cover by themselves, which were not installed properly. | |
| The front cover glass is strongly pressed or crashed. | |
| The waterproof plug of rear cover is loose. | |
| IPC failed to recognize SD card. | |
| Check if the card slot is loose. | |
| Check if the SD card in the computer is recognizable and there is no abnormality. | |
| Config info is mismatched with real situation after IPC working for a while. | |
| Refresh the interface. | |
| It is caused due to the modification of IPC config; it doesn’t belong to the IPC problem. Users can check what platform manages IPC or which device that the rear end is connected to. They can use check the exact reason by adopting separated checking method. Currently the PSS client and soft decoder can modify the Baud rate of some IPC, which leads to a situation where the IPC is out of control. | |
| Power adapter is unsteady. | |
| The high and low temperature environment is from 0℃ to 40℃ for general power adapters, the power supply will become unsteady if the adapter is beyond this range. Therefore, it is necessary to change to industrial power adapter | |
| SD card failed to store video. | |
| Check if the SD card status is set as read only status, if so; you need to change it to read/write status. | |
| Check if the SD card can be detected. | |
| Check if the SD card has been damaged. | |
| Check if the SD card is full, if it shows that the residual space is 0, you can format the SD card by WEB interface or check “Cover” in the “Storage management > Video control > hard disk full” of the WEB interface. | |
VideoLossAnalog
I connect the general analog camera to the device, there is no video output.
There are following possibilities:
- Check camera power supplying, data cable connection and etc. There might not be sufficient power from the power source. You can use a voltage tester if you have one on hand.
- Check the length of cable run. Refer to the specifications for the limitations on the cable length.
- This series device does not support the analog camera of all brands. Please make sure the device supports general standard definition analog camera.
- If there is no video, check the coax connection. Unsecured faulty connections will result in no video or intermittent video.
Video Loss Analog and CVI
I connect the standard definition analog camera or the HDCVI camera to the device, there is no video output.
There are following possibilities:
- For the product supports analog standard definition camera/HD camera, you need to go to the main menu*>Setting*>Camera*>Channel type to select corresponding channel type and then restart the DVR.
- Check camera power supplying, data cable connection and etc. There might not be sufficient power from the power source. You can use a voltage tester if you have one on hand.
- Check the length of cable run. Refer to the specifications for the limitations on the cable length.
- This series device does not support the analog camera of all brands. Please make sure the device supports general standard definition analog camera.
- If there is no video, check the coax connection. Unsecured faulty connections will result in no video or intermittent video.
IR effect is bad.
- Failed to enable all IR lights. Make sure the specified power supply is used for the correct voltage. Using the unspecified power supply can result in damaging the IR lights in addition to the camera.
- IR not illuminating far object. There are limitations of how far the IR can reach. Please refer to the specifications of the camera.
- IR-CUT is set as color mode, which caused the front-end sensor to fail to sense IR light. Set Camera IR setting to auto, this setting should have the front-end sensor to detect the IR.
- IR picture is white. It is very possible it is reflecting off a surface. Glass and reflective surfaces will cause the IR to reflect off of it. Change the elevation and angle. When you use the device on the table (especially rough surface), the IR light will shoot back to the lens, which will cause bad IR effect and white picture. At this moment, you should adjust the elevation angle of the lens or place the device on the edge.
- Check if camera IR is set to auto. If it is set to manual, the IR will not illuminate when it is dark.
- IR is not illuminating powerful enough. Make sure the plastic is off the cameras lens. The plastic can affect the effectiveness of the IR.
- IR is glaring. Check if there are debris on the cameras glass. Debris can cause infrared glare.
The device failed to record video and snapshot
- Device failed to take snap shot for motion event. From the local recorder menu , check the if the if motion detect for that camera is enabled, check if snapshot is checked off under the event settings. Make sure you apply and save.
- Device failed to record a motion event. From the local recorder menu , check the if the if motion detect for that camera is enabled, check if record is checked off under the event settings. Make sure you apply and save.
- Under schedule you will need to make sure it the schedule is set. Motion detection (MD) under the schedule needs to be also check off. Setting the schedule ensure the system will detect events such as Motion Detect in the date and time you set it for. Failing to do this will result in no snap shot.
- Time period might not be set. Set “video time period”, “snapshot time period” in the WEB interface; please refer to the manual for more details.
- Check if the “memory point” enable in the WEB interface is checked.
- Check if the connection of SD and FTP of video and snapshot storage is normal, try to connect FTP to the computer.
- Set “video mode” as manual or auto in the WEB interface.
- From the WEB interface , make sure snapshot is set to “trigger”. Under setup > image > encode > snapshot > mode > select trigger. This should work for IVS (if available), face detect and
Possible reason: “Snapshot time period” is set wrongly; storage path is not correct; “video mode” is set as off.motion detection if the snapshot box is checked off or selected from those event features.
Can not playback the downloaded file.
- There is no media player.
- No DXB8.1 or higher graphic acceleration software.
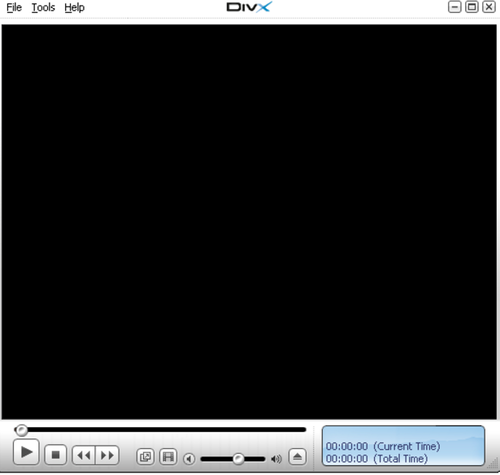
- There is no DivX503Bundle.exe control when you play the file transformed to AVI via media player.
- No DivX503Bundle.exe or ffdshow-2004 1012 .exe in Windows XP OS.
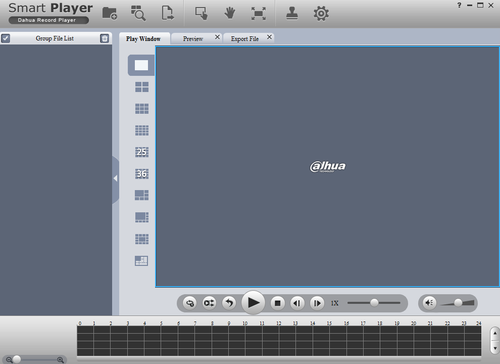
- Download Dahua Smartplayer from dahuasecurity.com to play DAV file.
- You can get the Dahua Smartplayer from backing up videos into a USB.
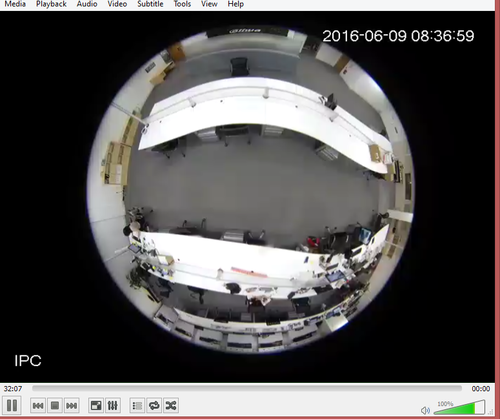
- Use VLC media player.
Link to Dahua Smart Player (DAV File)
http://www.dahuasecurity.com/download_detail_213.html
Link to VLC player for Windows and MAC.
http://www.videolan.org/vlc/download-windows.html
http://www.videolan.org/vlc/download-macosx.html
Link for AVI media player
http://www.divx.com/en/software/download/start
Load More :
Day/night config switch is invalid.
Possible reason: Device system time is not corresponding to computer time.
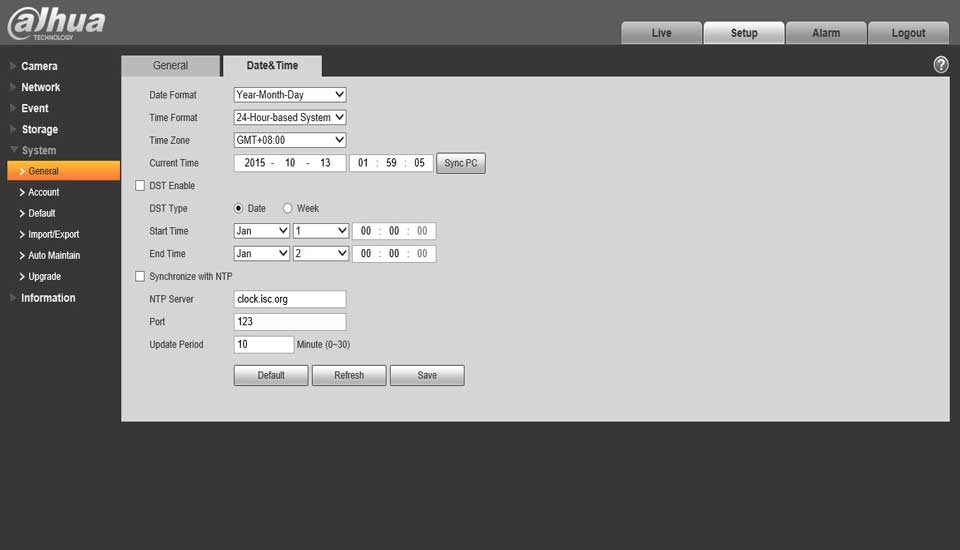
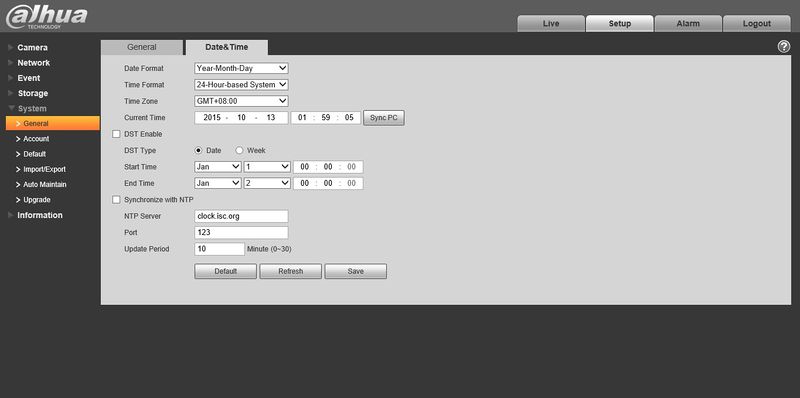
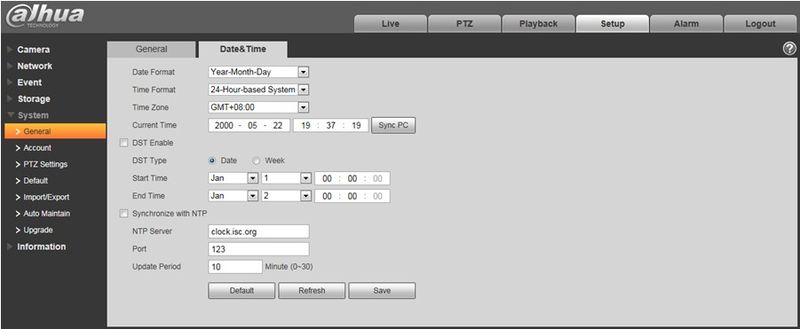
- Log into the web interface of the camera. Click on Setup, General and then the date and time option.
- Set time period according to the computer time.
- Synchronize the device time and current PC time by clicking on the sync pc button.
- Log into the web interface of the recorder and confirm date and time is synced correctly.
Device is leaking water.
- Users dismantled the front cover and rear cover by themselves, which were not installed properly.
- The front cover glass is strongly pressed or crashed.
- The waterproof plug of rear cover is loose.
IPC failed to recognize SD card.
- SD card might be loose. Which would case the IP camera not to read recognize the SD card. Check if the SD card is secure.
- Check if there is SD card connection pins. Some models may have the slot with no connection pins. If this is the case please refer to the specifications and place of purchase.
- Check if the SD card in the computer is recognizable and there is no abnormality.
- It is possible the SD card is bad. Try the SD card in other devices to see if it is recognized. It is possible the connections of the SD card are damaged. If this is the case, refer to the place of purchase.
SD card failed to store video.
- Check if the SD card status is set as read only status, if so; you need to change it to read/write status.
- Check if the SD card can be detected.
- Check if the SD card has been damaged.
- Check if the SD card is full, if it shows that the residual space is 0, you can format the SD card by WEB interface or check “Cover” in the “Storage management > Video control > hard disk full” of the WEB interface.
- Check if the model is compatible with an SD card. Though it might have an SD card slot there might not be SD card reader inside.
Cross stripe or diagonal stripe appears in the image of IPC.
- Bad connection for the video cable. Check or test with a different cable, connection and port.
- Strong current interference. Check if there are other devices causing this issue. It could be the cable too close to another device. Mounting the camera on a metal surface can cause current interference from bleeding electrical currents.
- A ground loop can be causing the stripes. Ground loops occur for a few different reasons but this issue will always present itself in the form of horizontal lines running across your screen (hum bars).Faulty power supplies and/or faulty cable are frequent culprits but improper wiring in the home/building is much more common. If you discover that your image problems are related to the power supply or cable, you simply need to swap them out. However, if bad wiring in the structure is found to be the problem, locating it and then having someone fix it is not exactly a quick or cheap fix. This is where ground loop isolators come in. They’re simple plug-and-play adapters that attach to the back of your camera and then filter this electrical noise out of your video feed.
- Power Supply.There are several things that can go wrong with a power supply but related problems will always appear in your video as “rolling lines.” These are horizontal lines across your screen that will normally move from bottom to top; lines moving in the opposite are not unheard of so don’t rule it out. The image from your camera will remain behind these lines and will not move with them. This can often be confused with the lines you can get from a ground loop problem, but the lines caused by a group loop will remain in a single static position.
Gray screen appears in the IPC.
- Gray screen appears in the IPC, it can recover after restart under the state of power off. Power cycle the device.
- Gray screen appears repeatedly. Check length of the cable run or try different cables. Check POE on switch or NVR. It could be also caused insufficient power supply.
- Check if the IPC power supply mode and power adapter are too far away from the IPC.
How to Modify IP Address of IP Camera / Change IP Camera that is stuck on “192.168.1.108”
Description
This guide will show how to initialize a Dahua IP Camera and modify the IP Address
Prerequisites
- Windows Computer to use Config tool
- Wired or wireless connection to the router or switch
- Powered IP camera, connected to the network
Video Instructions
Step by Step Instructions
How To Initialize Camera
Preparing the Computer
The computer should be assigned an IP that is set to the same subnet as the default IP the device will be at. Most Dahua devices will default to the IP address 192.168.1.108
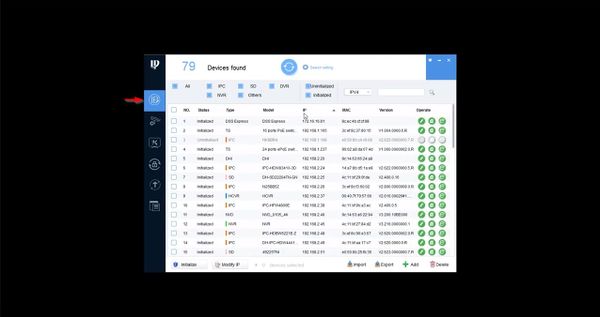
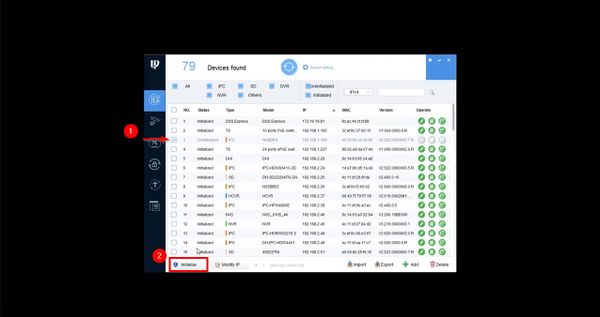
1. Launch ConfigTool
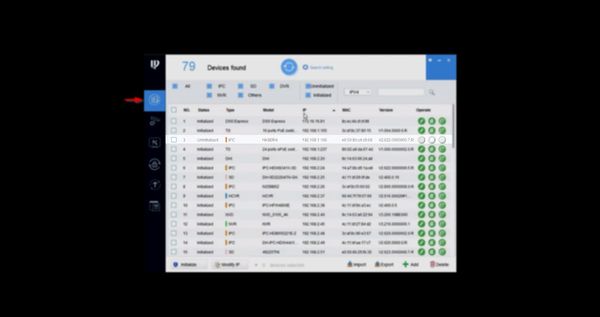
2. Uninitialized devices will appear in the list at their default IP 192.168.1.108
3. To initialize the camera:
- Check the box next to the device in the list
- Click Initialize
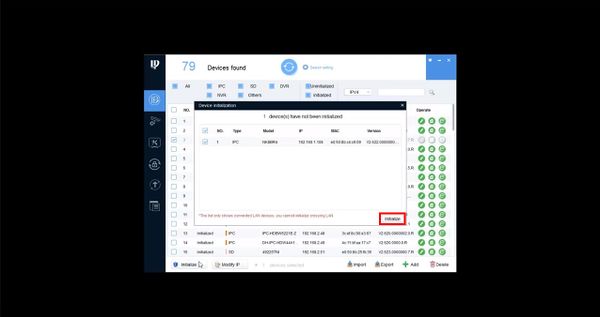
4. The Device initialization window will appear
Devices on the network that have not been initialized will appear in this window
Check the box next to the device then click Initialize
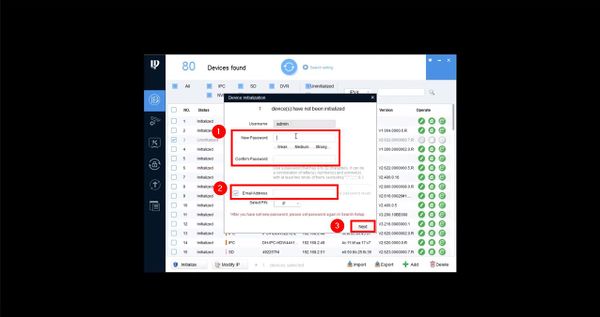
5. Continue with device initialization:
- Create a password for the device by entering it twice in the Password fields
- Enter an email address, which is used for password reset
Click Next
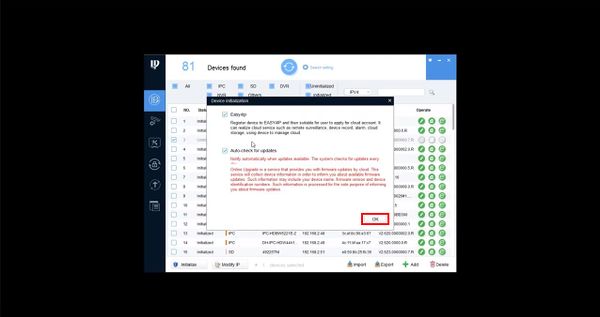
6. Select the options for ‘Easy4ip’ and ‘Auto-check for updates’ as desired then click OK
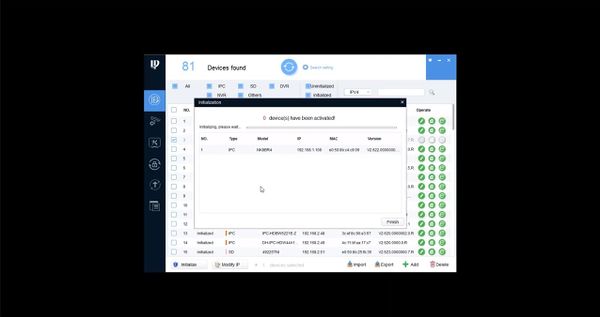
7. Device initialization will begin to process
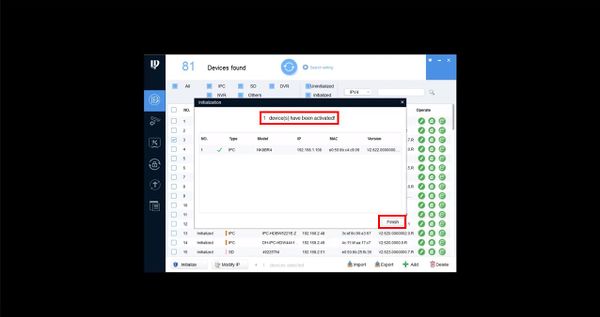
8. A message will confirm a successful initialization.
Click Finish
How To Change IP Address
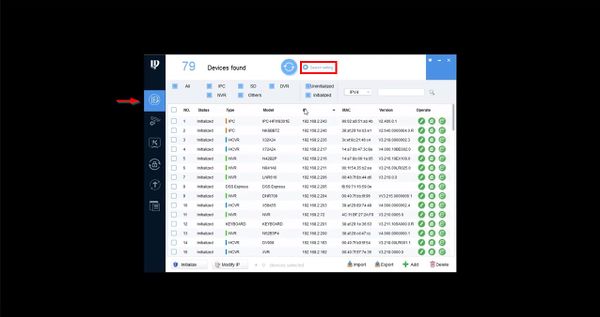
1. From the ‘Modify IP’ section of ConfigTool
Click ‘Search setting’ at the top of the page
2. Enter the username/password for the device (created in the previous guide)
Then click OK
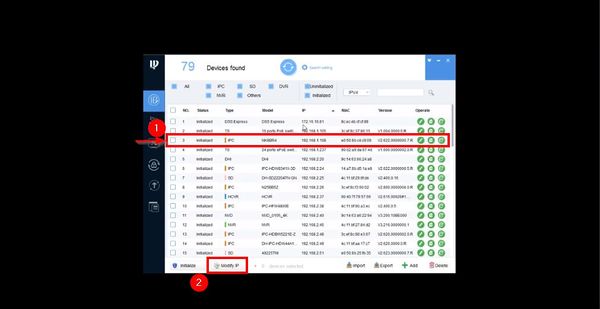
3. The device will appear in the list.
To change the IP address for the device:
- Check the box next to the device
- Click Modify IP
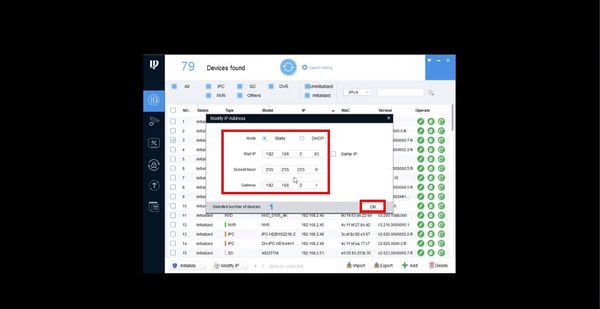
4. The Modify IP Address window will appear
Change the IP as desired, entering all information
- Mode: Static or DHCP
- Start IP: IP of device
- Subnet Mask: Subnet mask for network
- Gateway: Gateway for network
Then click OK
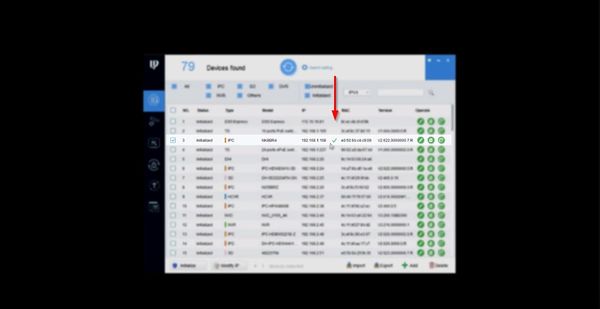
5. A green check mark next to the device in the list will confirm a successful IP change
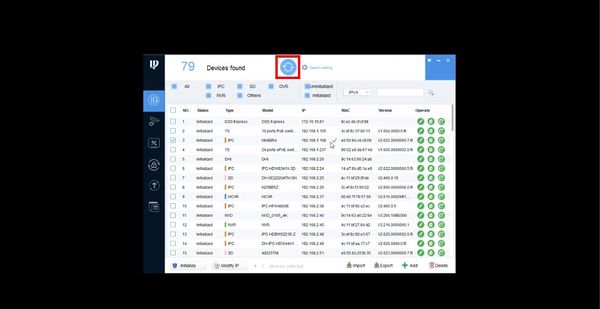
6. Click the Refresh button
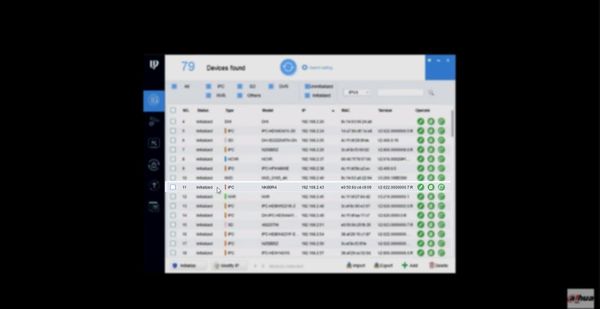
7. The device will appear in the list with the updated IP information
