How To Install Configure Uniview LPR, An LPR will take pictures and video of license plates and will convert the picture of the license plate to text. It will then use that text to create a database of license plates entering and exiting your property. You can browse through all your captures or search for a specific license plate.
Step 1 – Installation
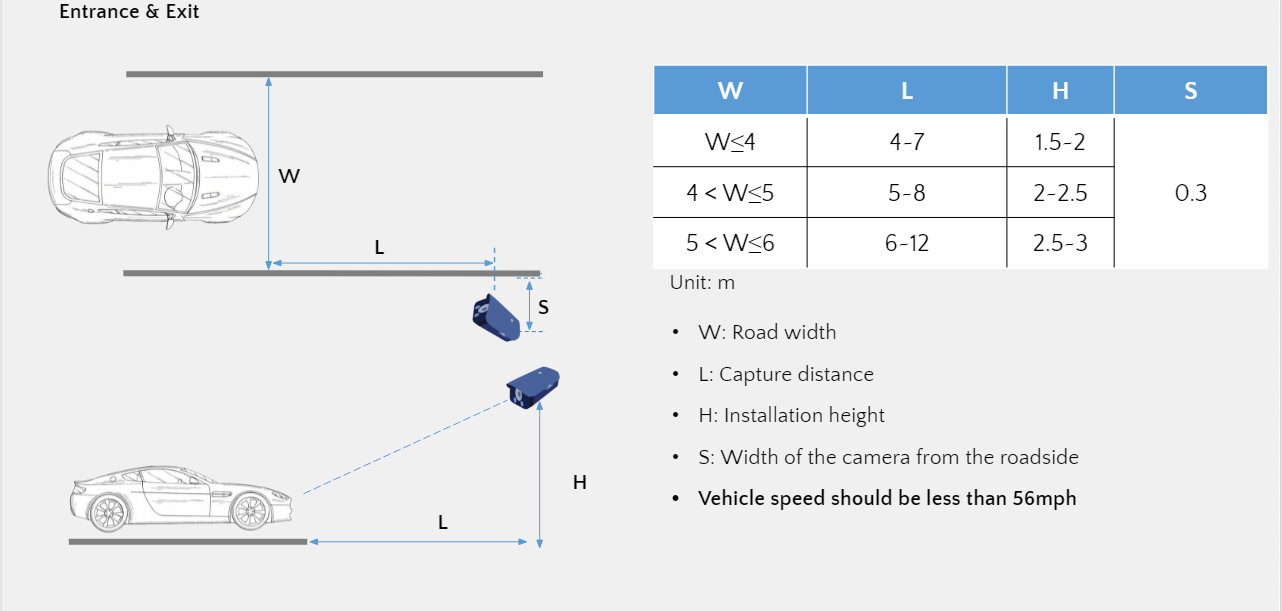
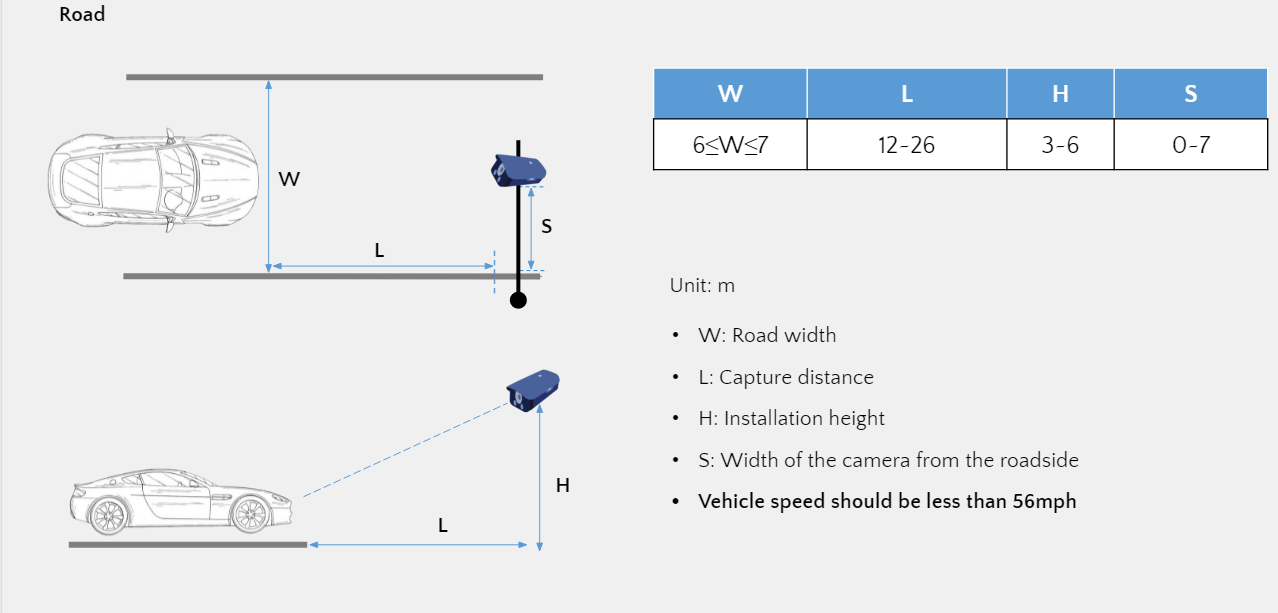
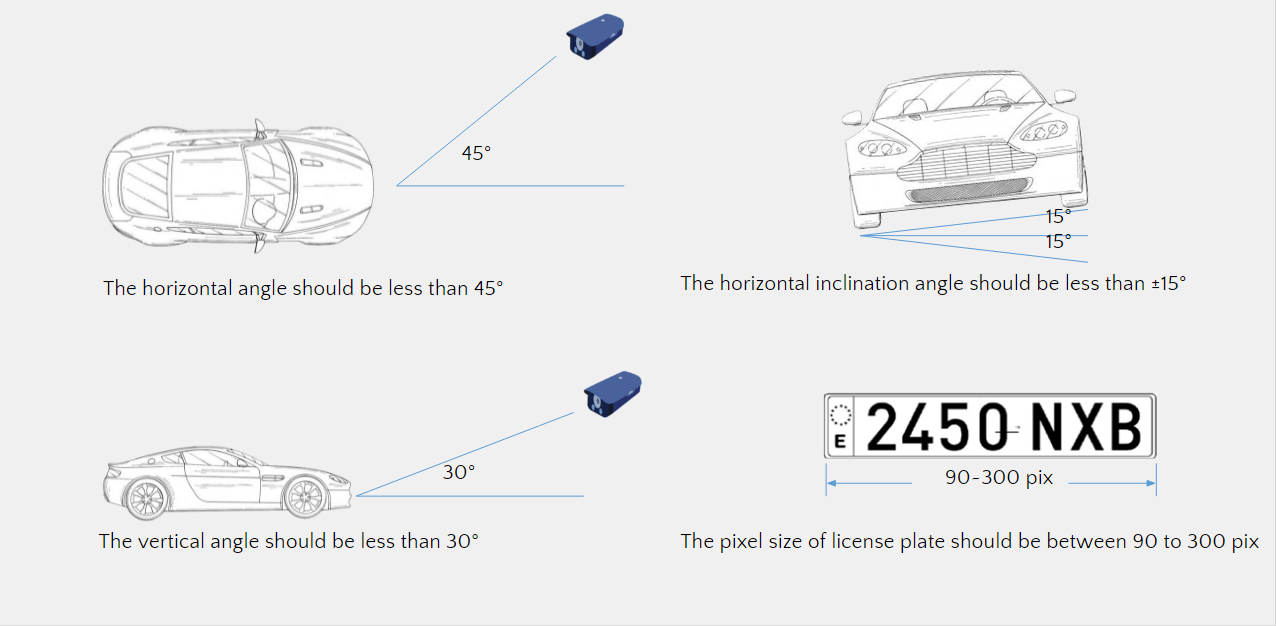
Below are some requirements of how the LPR camera should be installed.
Entrance & Exit
Road
Mounting Angle
How To Install Configure Uniview LPR
Read Next : Advanced Uniview IP Camera Guide
Step 2 – Configuration
In this guide, we will be referencing the HC121@TS8CR-Z‘s web interface for the LPR Configuration.
From the Live View, Select Setup -> Smart to find the section on configuring the LPR functionality.
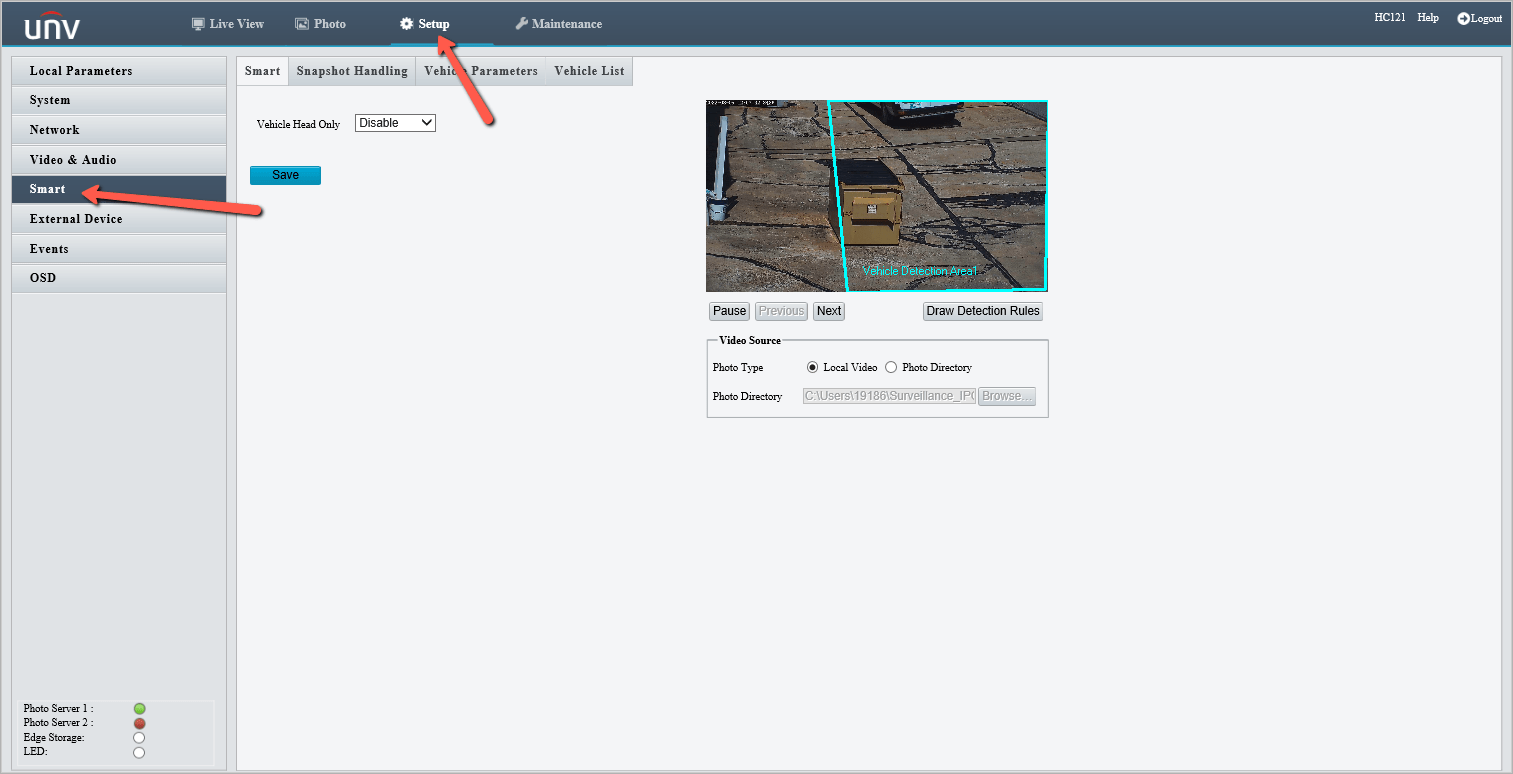
To create the area for the LPR to read plates, Select Draw Detection Rules
A popup window will appear to give you the ability to draw the detection area.
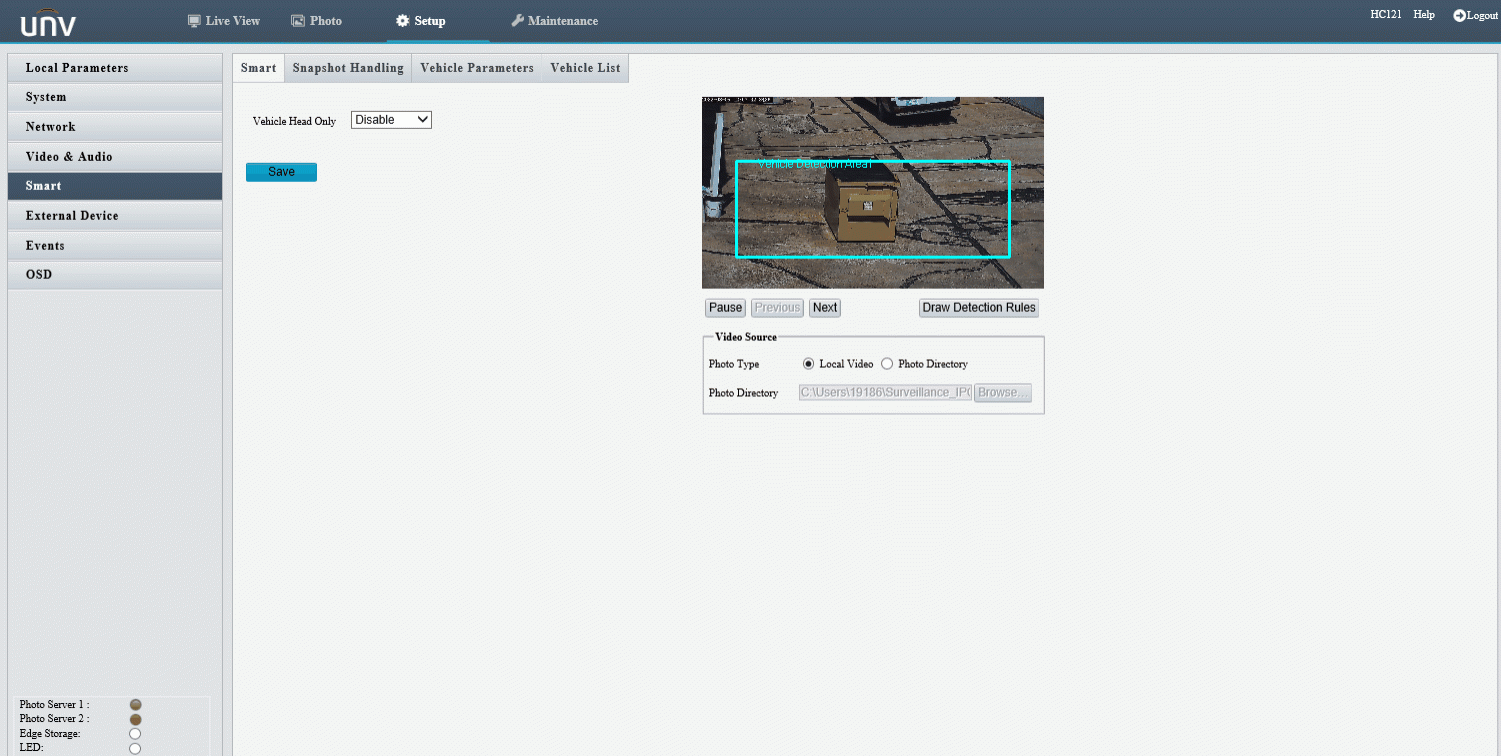
Once you have drawn an appropriate area, click OK, then Save.
Step 3 – Live View Examples
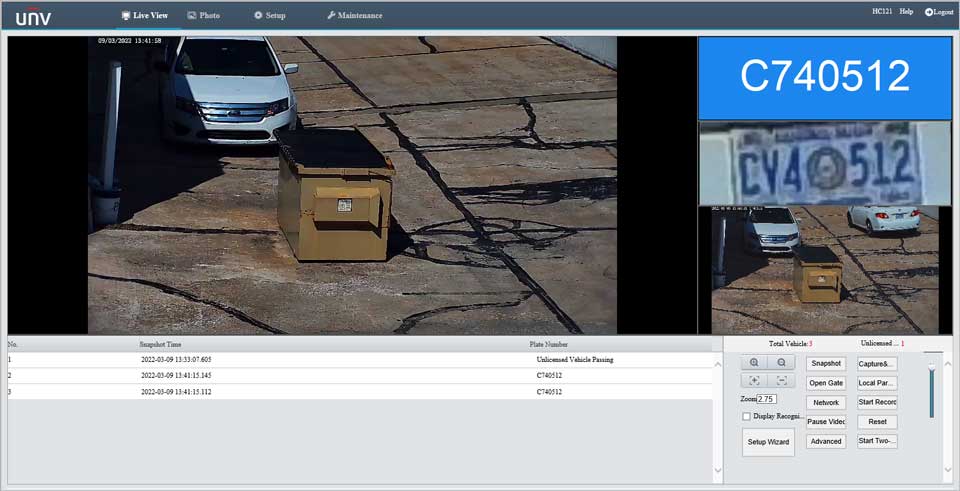
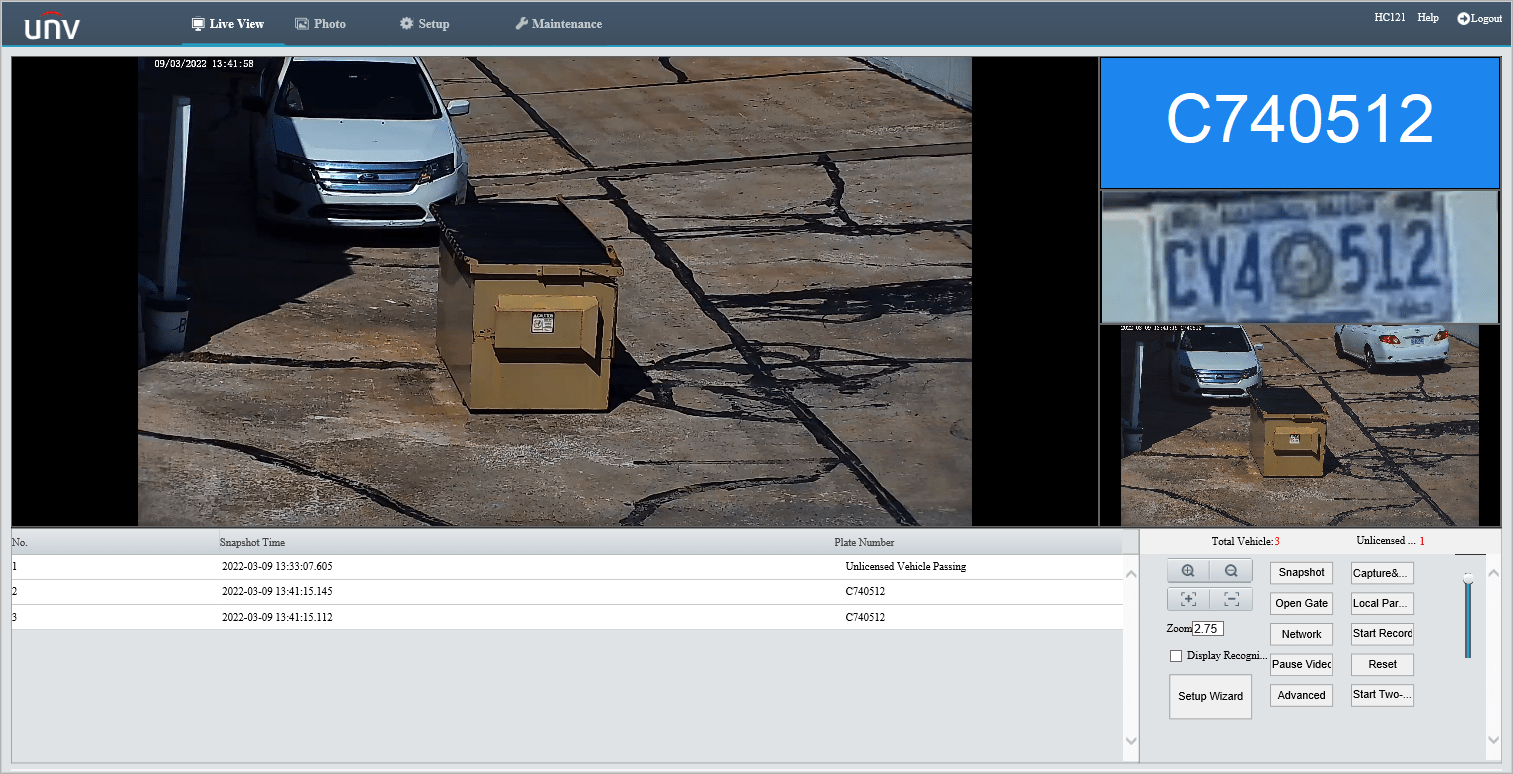
From the Live View now on the LPR, you should start getting Real Time Results as vehicles drive through the detection area.
LPR Image Settings
This thorough guide will go through all of the image settings of the UNV LPR to help understand what a user can adjust to help the camera Recognize Plates more effectively.
Scenes
This page is used to configure strong front light and back light scenes.
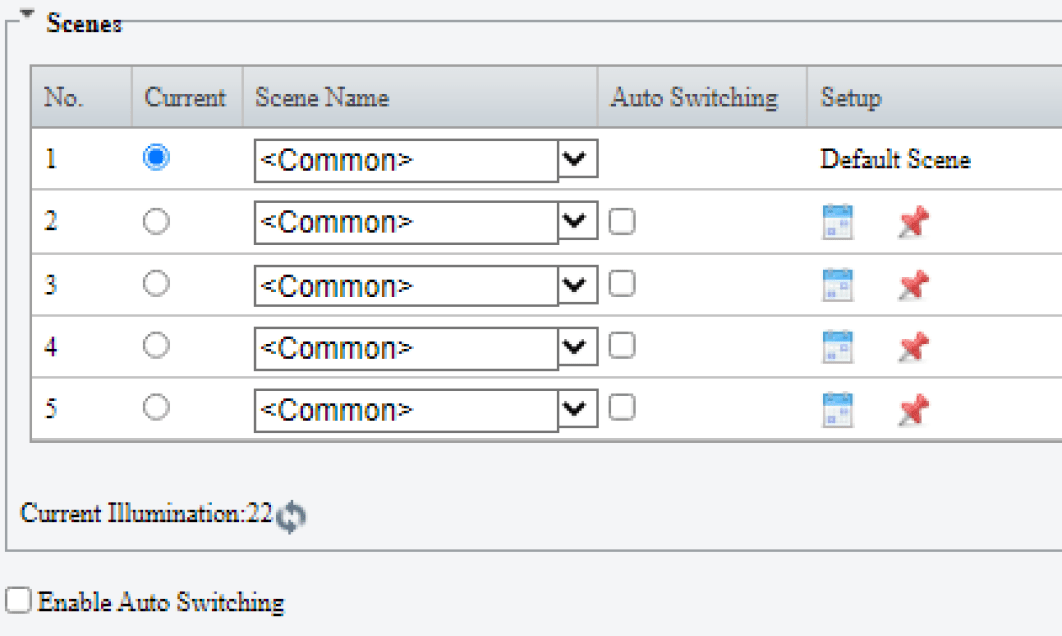
Parameter Descriptions
Common. Values Test and Indoor can be ignored. In strong front light and back light scenes, you can set the value to Custom, and adjust the exposure compensation value.
Please Note
Image Enhancement
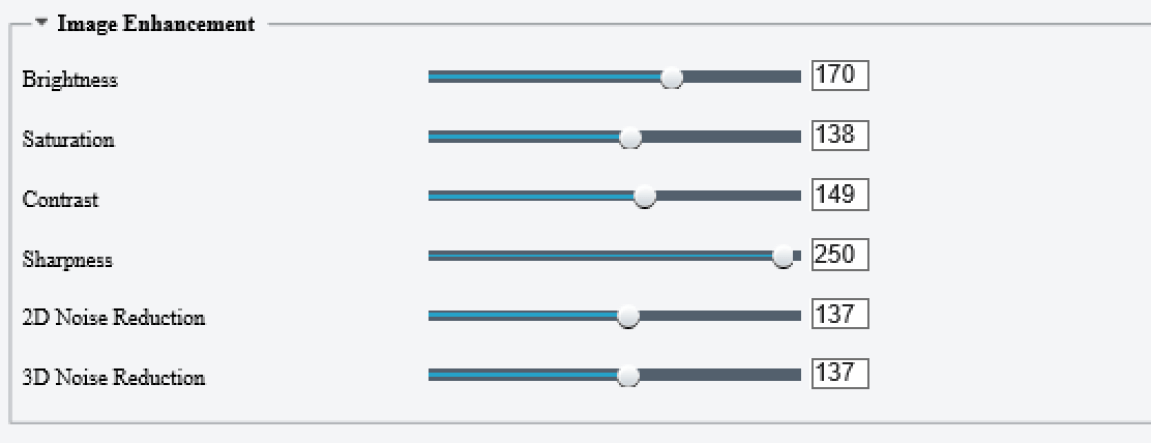
Parameter Descriptions
Exposure
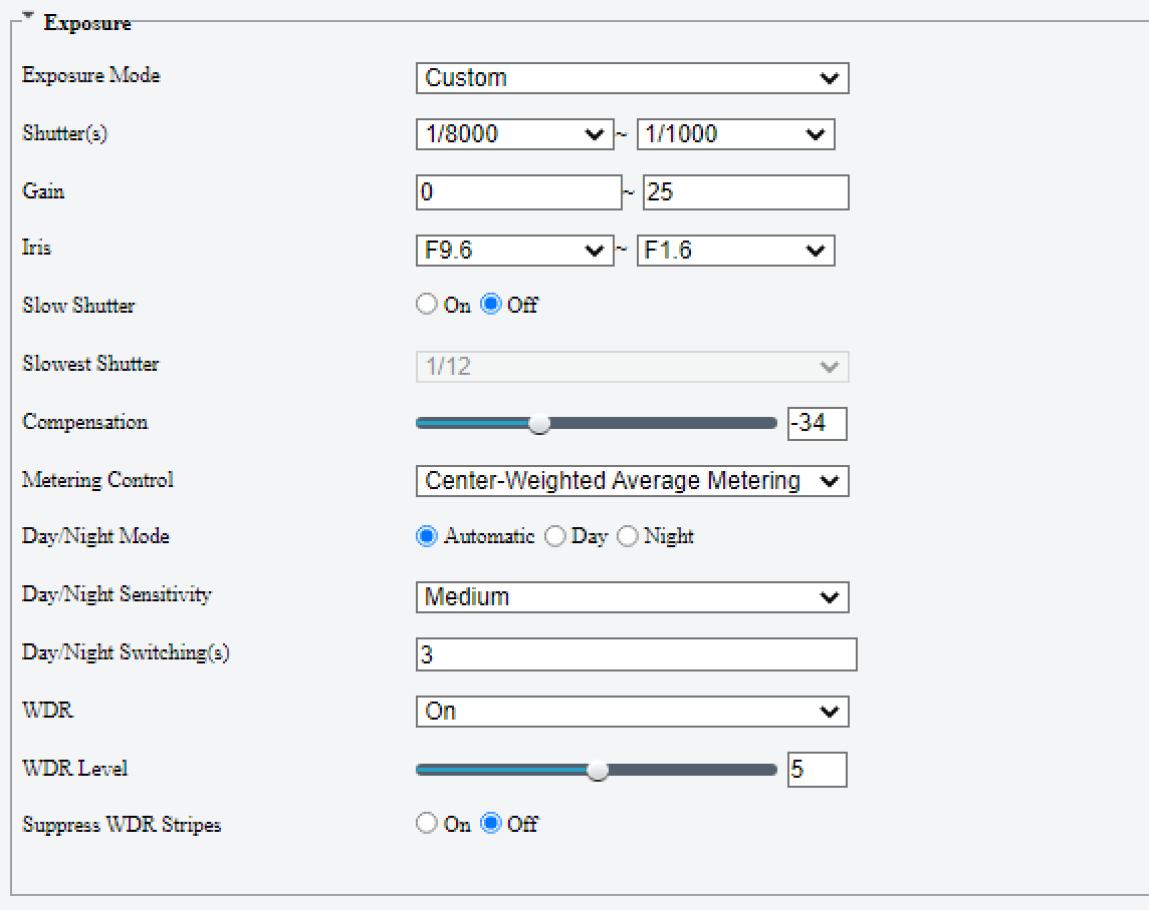
Parameter Descriptions
Iris Priority, Indoor 50Hz, Indoor 60Hz, Manual, and Low Motion Blur. You
can keep the default setting.
Smart Illumination
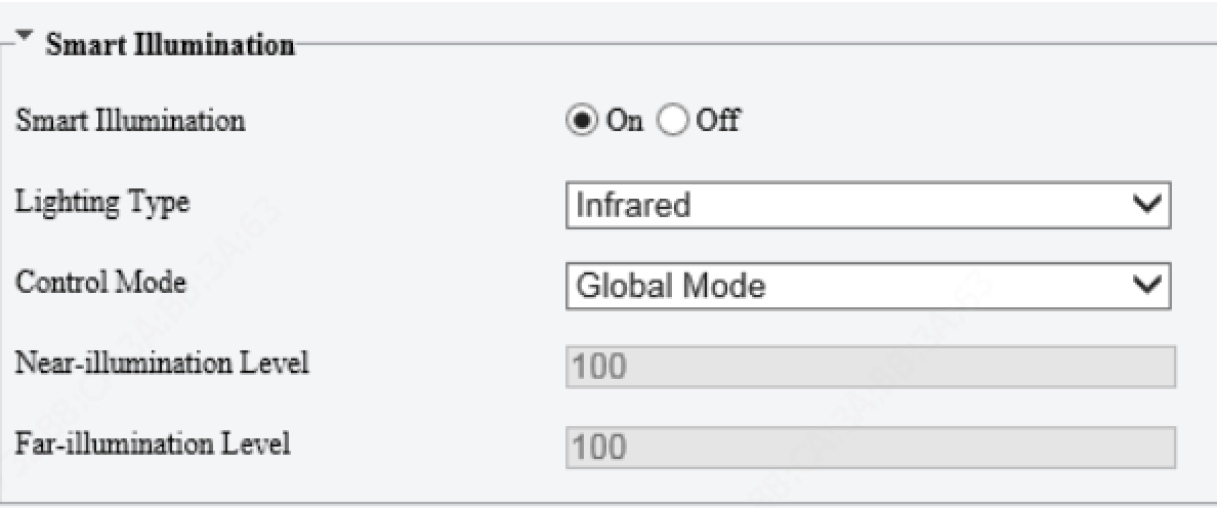
Parameter Descriptions
supplement lamp in the daytime and turns off the lamp at night.
Focus & White Balance
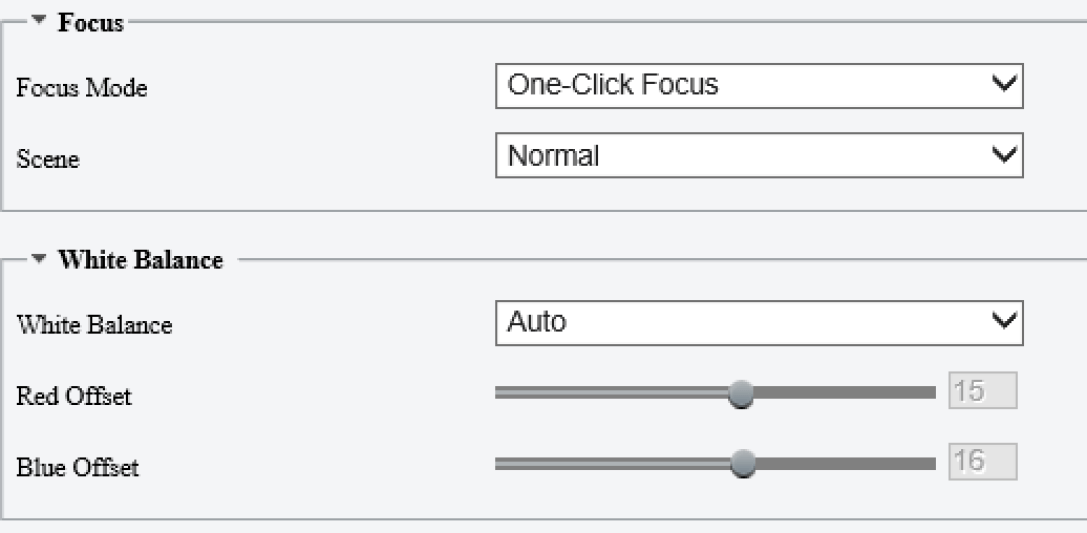
Parameter Descriptions
changes, and automatically triggers focusing if the scene changes, which
easily causes false triggering.
Photo Server Configuration for LPR
The Photo Server is needed for your UNV NVR to store the snapshots that come from the LPR. Which will allow for plate searching on the NVR side.
Step 1 – LPR Setup
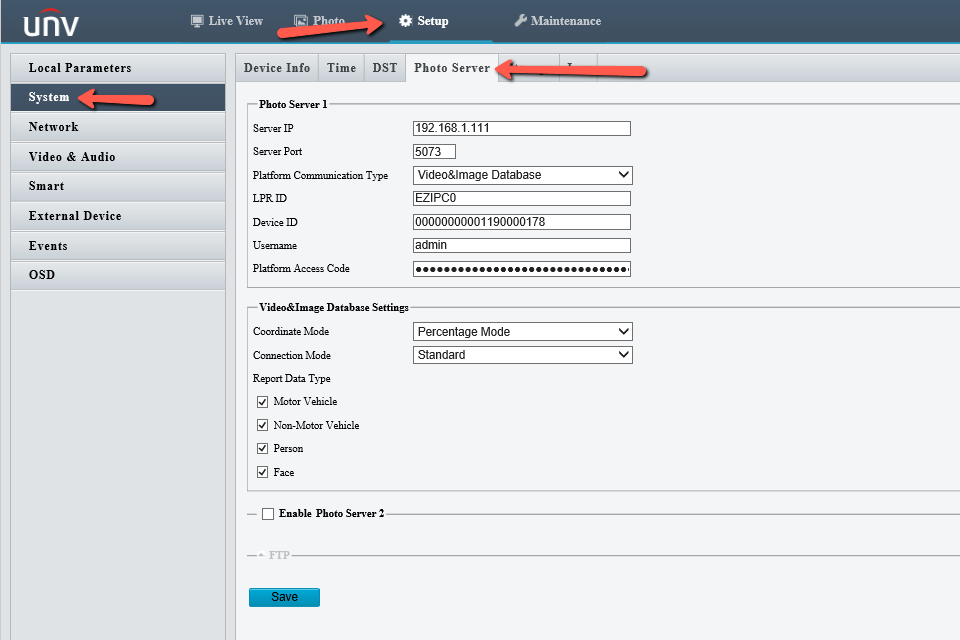
Choose Setup > System > Photo Server, and set Platform Communication Type to Video&Image Database.
Set Server IP to the IP address of the NVR, Server Port to 5073, and LPR ID to any value. Device ID is a 20-digit number unique on the LAN, and digits 11–13 must be 119. Username and Platform Access Code are the username and password for login to the server/NVR.
Video&Image Database Settings – choose Pixel Mode or Percentage Mode to display the coordinate
information of detection objects.
Note
Step 2 – NVR Setup
Enable the Video&Image Database Server and more options will appear:
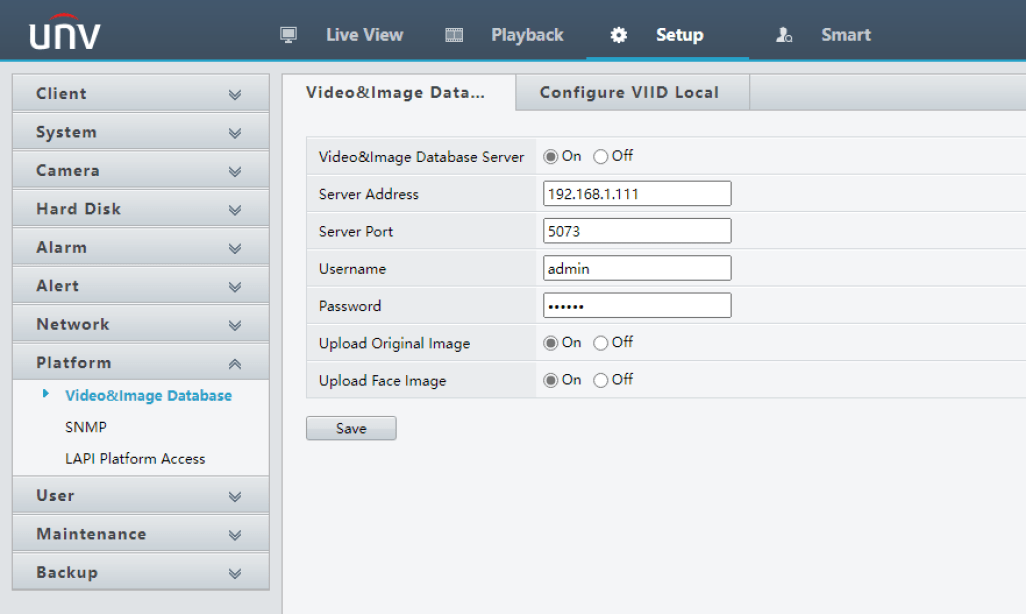
Add the camera to a platform, for example, NVR304-16X: Log in to the NVR, and choose Setup > Platform > Video&Image Database -> Configure VIID Local
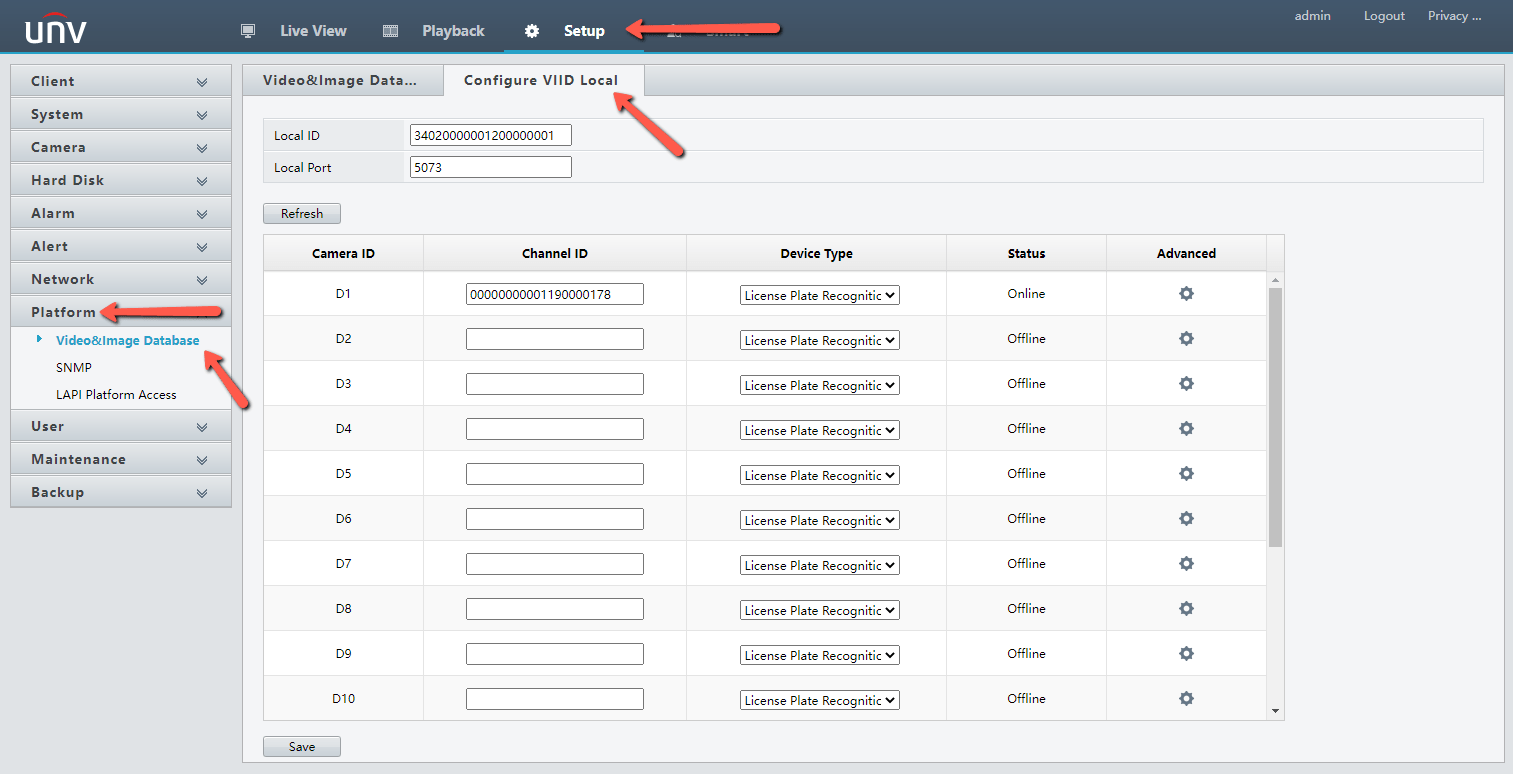
Keep the default values of Local ID and Local Port. If configuration is necessary, set Local ID to a 20-character string unique on the LAN with digits 11–13 as 120. Local Port is set to 5073 by default.
Select the same channel that the LPR is on, such as D1 in this example, Enter Camera ID, which is Device ID in step 1.
Click Save to save the configuration. Then, check the Status column. Online indicates that the camera is successfully registered.
Step 3 – LPR Confirmation
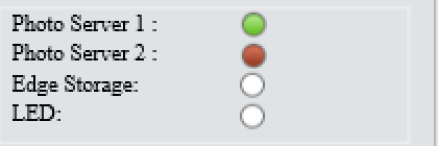
After successful registration on the NVR, log in to the camera and check whether the indicator of Photo Server 1 turns to “🟢”.
License Plate Search via NVR
Uniview NVRs have the ability for Plate Searching!
Firstly, you must have a Uniview NVR that supports the LPR functionality.
At the time of writing this article, here are the current models with LPR support:
NVR302-08E2-P8 & NVR302-16E2-P16
NVR304-16E2-P16 & NVR304-32E2-P32
NVR304-16X & NVR304-32X
NVR308-16X & NVR308-32X & NVR308-64X
NVR516-64 & NVR516-128
NVR824-128R & NVR824-256R
This guide follows after the Photo Server has been configured in both the LPR & NVR. If you need to do that still, Click Here for that guide. Then come back to this one!
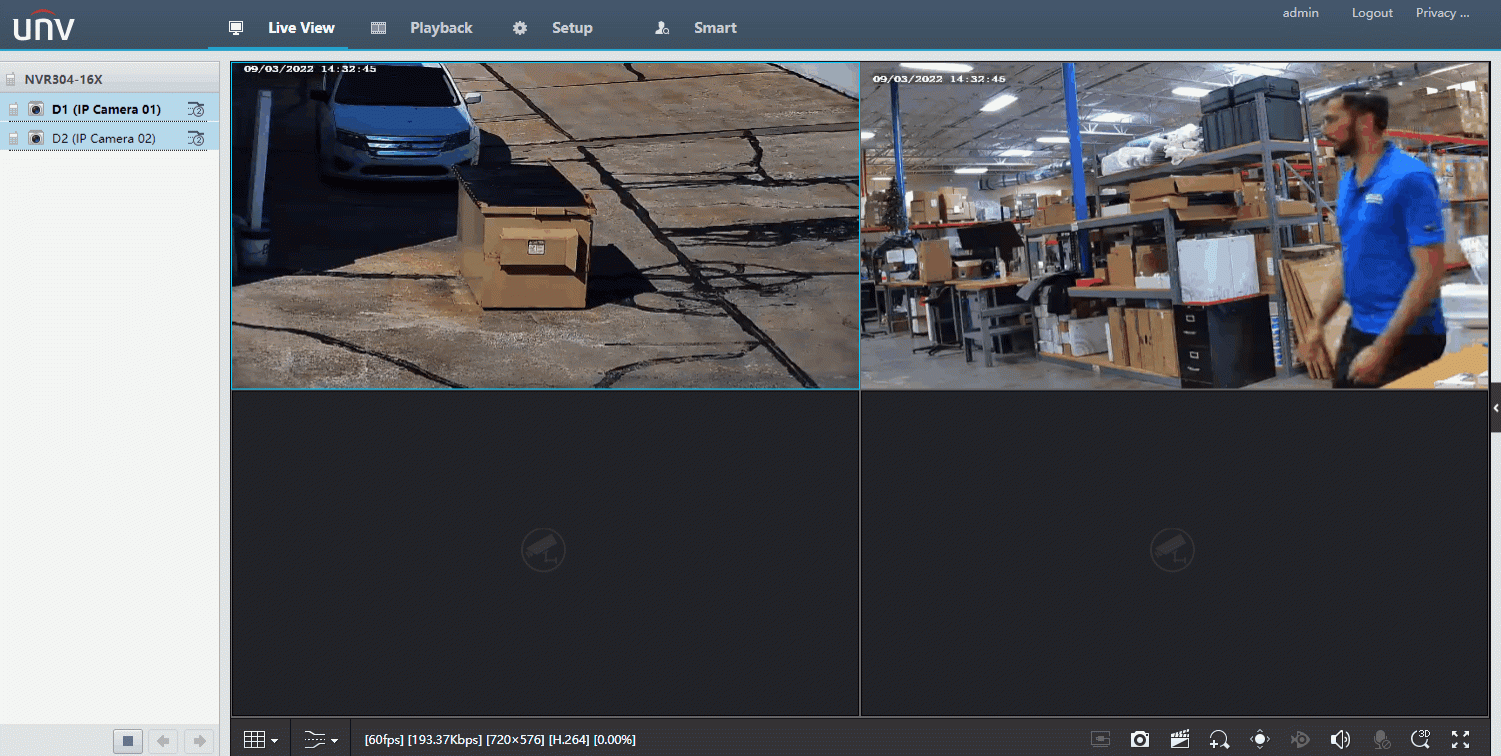
Web Interface
From the Live View of your NVR’s Web Interface, select the Smart Tab across the top of the page.
Then on the left side, hover your mouse over the icons and select VCA Search -> Vehicle Search
Choose the channel your LPR is on, enter the timeframe, Plate Color*, Vehicle Color*, & Plate Number*, then Click Search.
Note that the Plate Color, Vehicle Color and Plate Number are totally optional!
HDMI Interface
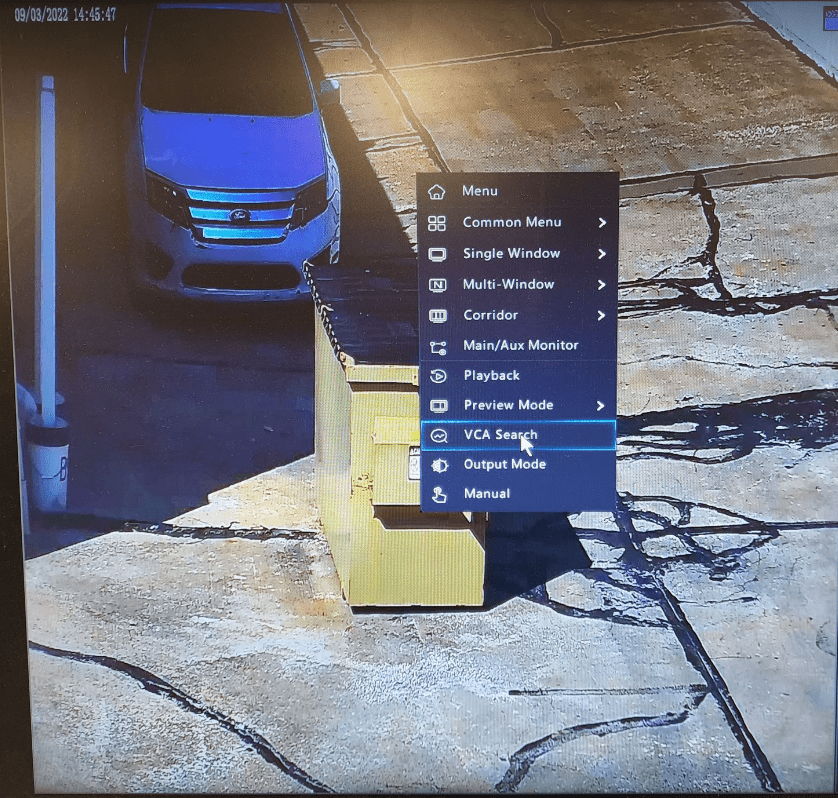
From the Live View of your NVR’s HDMI Interface, right click and select VCA Search -> Vehicle Search
Choose the channel your LPR is on, enter the timeframe, Plate Color*, Vehicle Color*, & Plate Number*, then Click Search.
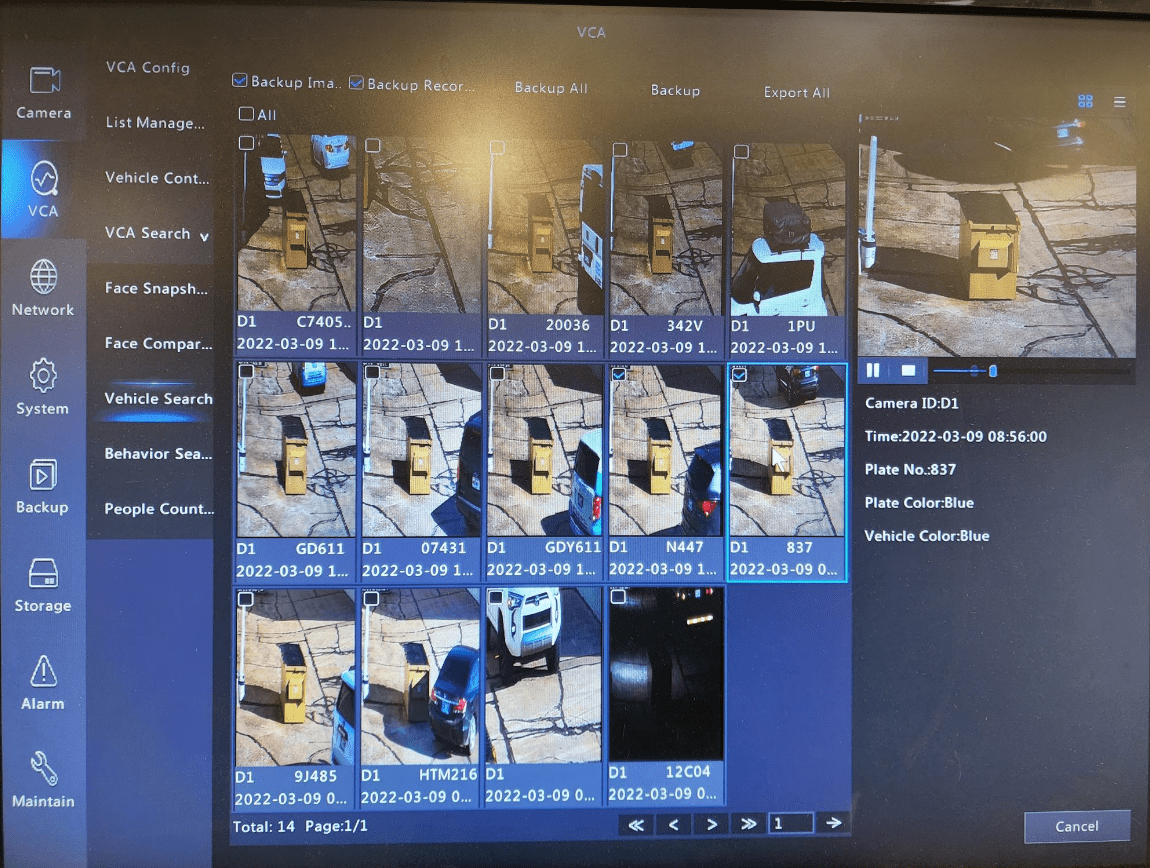
Note that the Plate Color, Vehicle Color and Plate Number are totally optional!