Purpose:
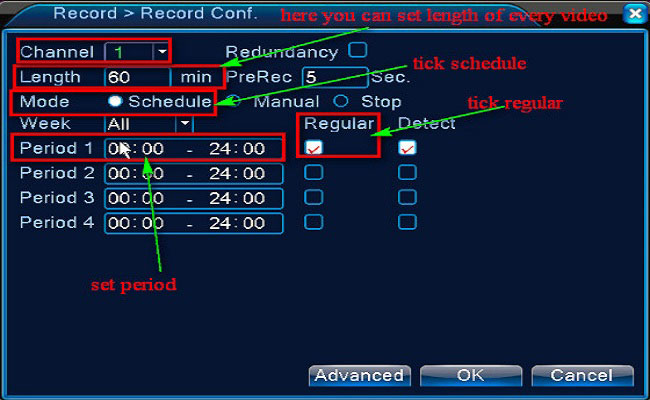
You could setup 24 hours recording for the system. Please make sure there is an internal hard disk drive before recording. Without the hard drive, the system can show live viewing, but can’t record, playback either.
Steps:
1. Confirm hard drive was installed.
Newly installed hard drive needs formatting. Please format the hard drive like the picture below.
Please go to Main Menu—HDD—General—HDD Information to find this page.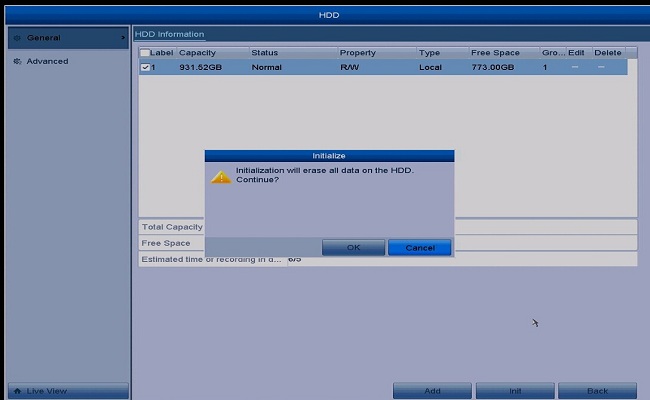
2. Then please check if the status of HDD is normal or not. It should be normal so that the system could record.
If the status is abnormal or other status, please refer to this instruction to make it normal first.
https://help.annke.com/hc/en-us/articles/360000252901
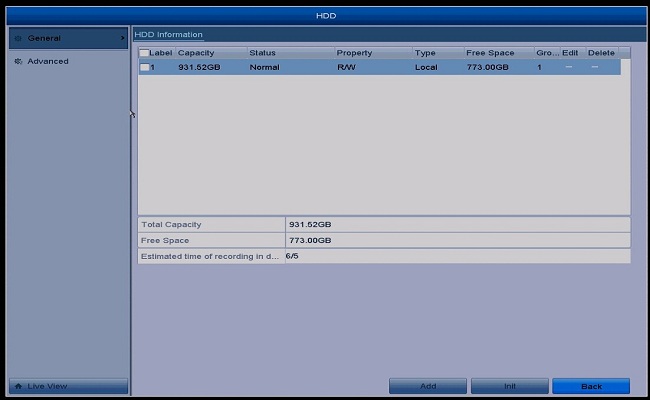
3. Go to Main Menu–Record–Schedule–Record to set up recording.
3.1 Please select the camera which you want to make a recording first.
3.2 Please enable Schedule.
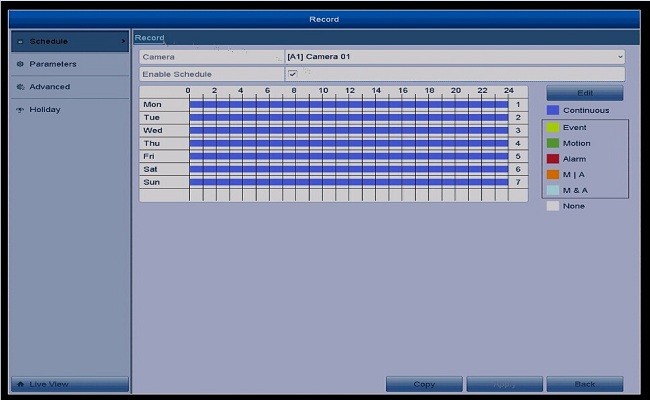
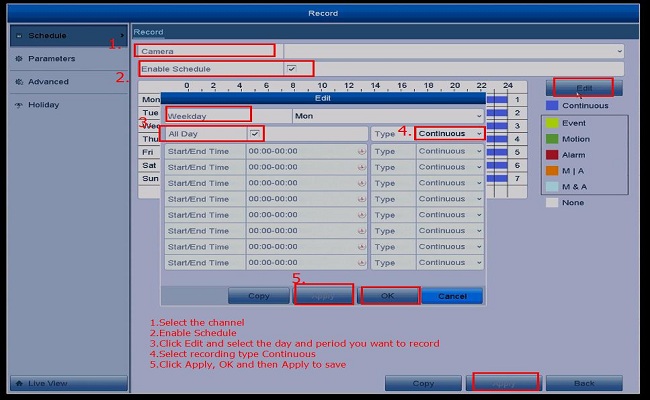
3.3 Please click Edit to setup the schedule.
Weekday: You need to setup the date one by one.
Please enable all day.
Type: Continuous.
4. After that, the blue bar will be showed on the record page. That means you have setup 24 hours recording.
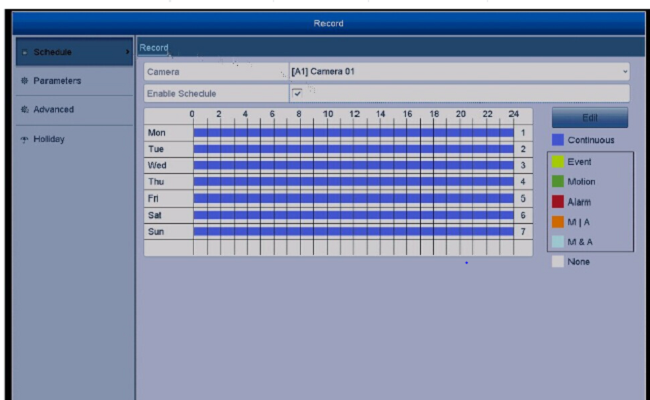
And this icon  on the monitor also means you have already set up schedule recording.

Purpose: You could set up motion detection for your system.
Steps:
1. Please go to HDD–>General and make sure there is a hard drive in the recorder and the status is normal.
If the status is abnormal or another status, please refer to this instruction to make it normal first.
https://help.annke.com/hc/en-us/articles/360000252901

2. Go to Record–>Schedule to set up motion detection recording.


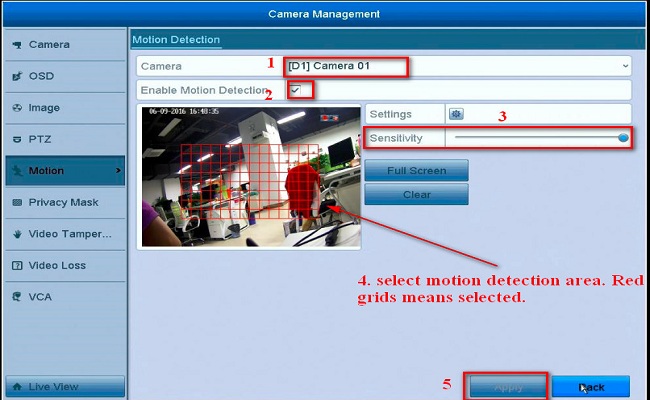
3. Go to Camera–>Motion to enable motion detection.


4. Go to Menu–>Playback to play motion detection recording.


What to Do If Hard Disk Drive Can’t Be Recognized?
We sell the system with a hard drive. But we also sell a system without one.
Please make sure yours does include a pre-installed hard drive inside first.
Please log in to the system and then go to the Menu–>HDD–>General and check if there is the hard drive and its status is normal.
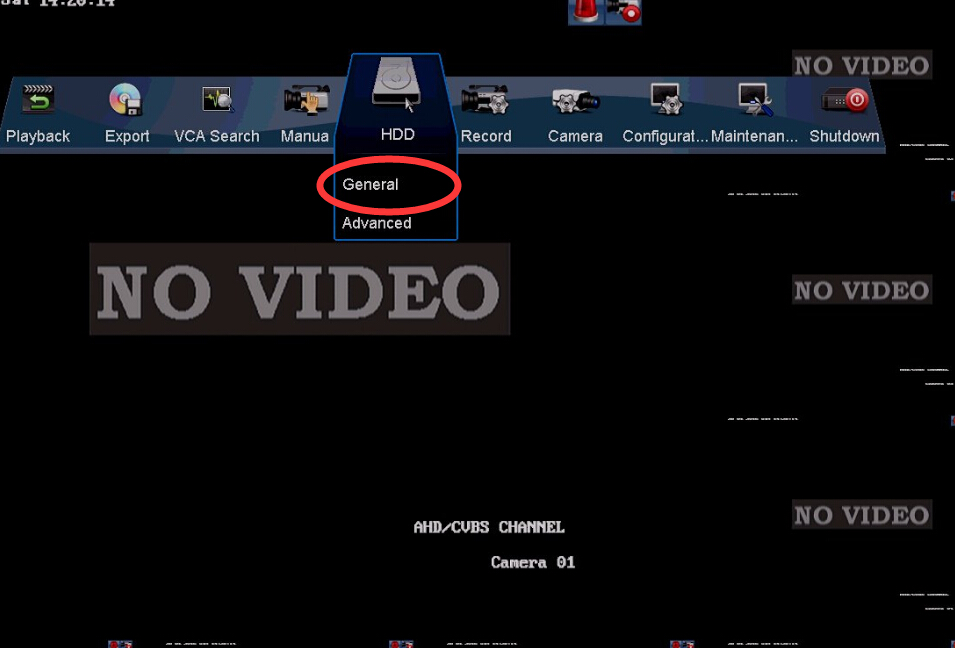
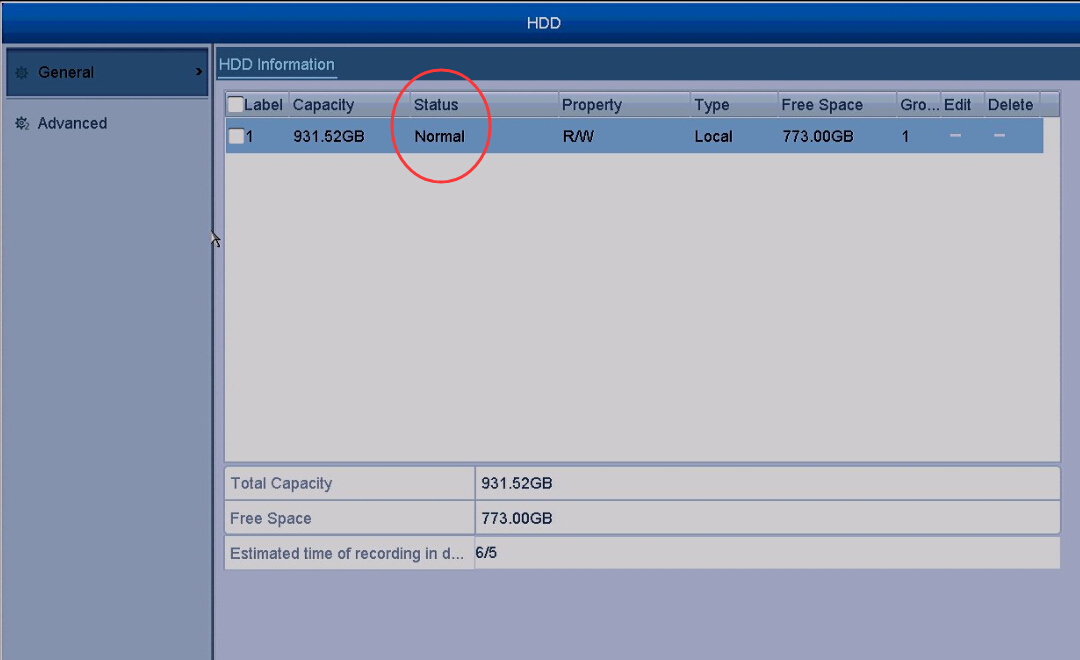
If there is nothing on the storage or the status is not normal, it means something is wrong.
Please try the troubleshooting methods below.
1. If the hard drive is not from us, please make sure your hard drive meets all requirements in the link below.
https://help.annke.com/hc/en-us/articles/360000513441
Please make sure your hard drive is for surveillance use, not for PC use,
2. Open the cover of DVR/NVR. Uninstall and install HDD several times. Hers is the method:
https://help.annke.com/hc/en-us/articles/360000252782
3. Install the hard drive and put the hard drive close to your ear to check if you can hear some noise. One hour later, use your hands to touch the hard drive to check if it is warm. If you can not hear any sound and the surface of the hard drive is not warm, it can prove the hard drive is not even powered up. Please share our results.
4. Unplug DVR or NVR from power and plug it again.
5. Restore DVR or NVR to factory settings.

6. Change another power adapter for the DVR.
7. Try a spare DVR or HDD if you have one.